Cat Hipsterizer
이탤릭 볼드 이탤릭볼드
Workflow stages
- Question or problem definition.
- Acquire training and testing data.
- Wrangle, prepare, cleanse the data.
- Analyze, identify patterns, and explore the data.
- Model, predict and solve the problem.
- Visualize, report, and present the problem solving steps and final solution.
- Supply or submit the results.
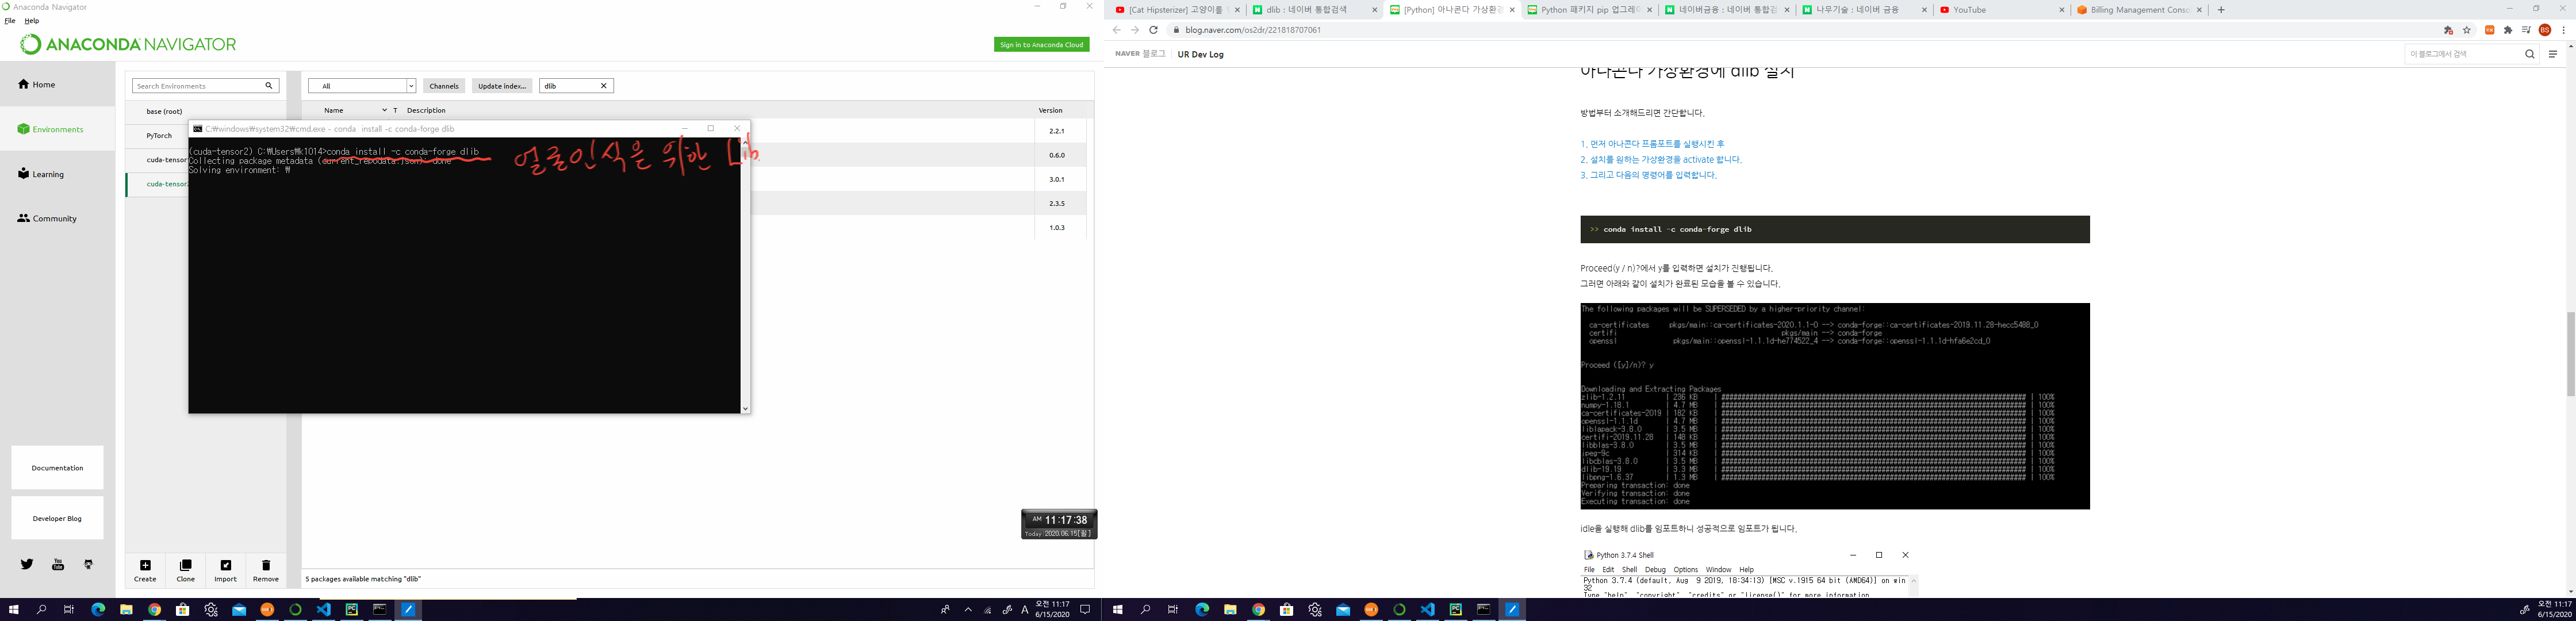
기본적으로 설치되어 있어야하는 패키지는 아래 코드 를 사용한다.
import random, sys
import dlib, cv2, os
import pandas as pd
import numpy as np

# Train


# visualization
import seaborn as sns
import matplotlib.pyplot as plt
%matplotlib inline

# machine learning
from sklearn.linear_model import LogisticRegression
from sklearn.svm import SVC, LinearSVC
from sklearn.ensemble import RandomForestClassifier
from sklearn.neighbors import KNeighborsClassifier
from sklearn.naive_bayes import GaussianNB
from sklearn.linear_model import Perceptron
from sklearn.linear_model import SGDClassifier
from sklearn.tree import DecisionTreeClassifier
data 가져오기
dirname = 'CAT_00'
base_path = 'C:/Users/k1014/PycharmProjects/cat_hipsterizer/images/%s' % dirname
file_list = sorted(os.listdir(base_path))
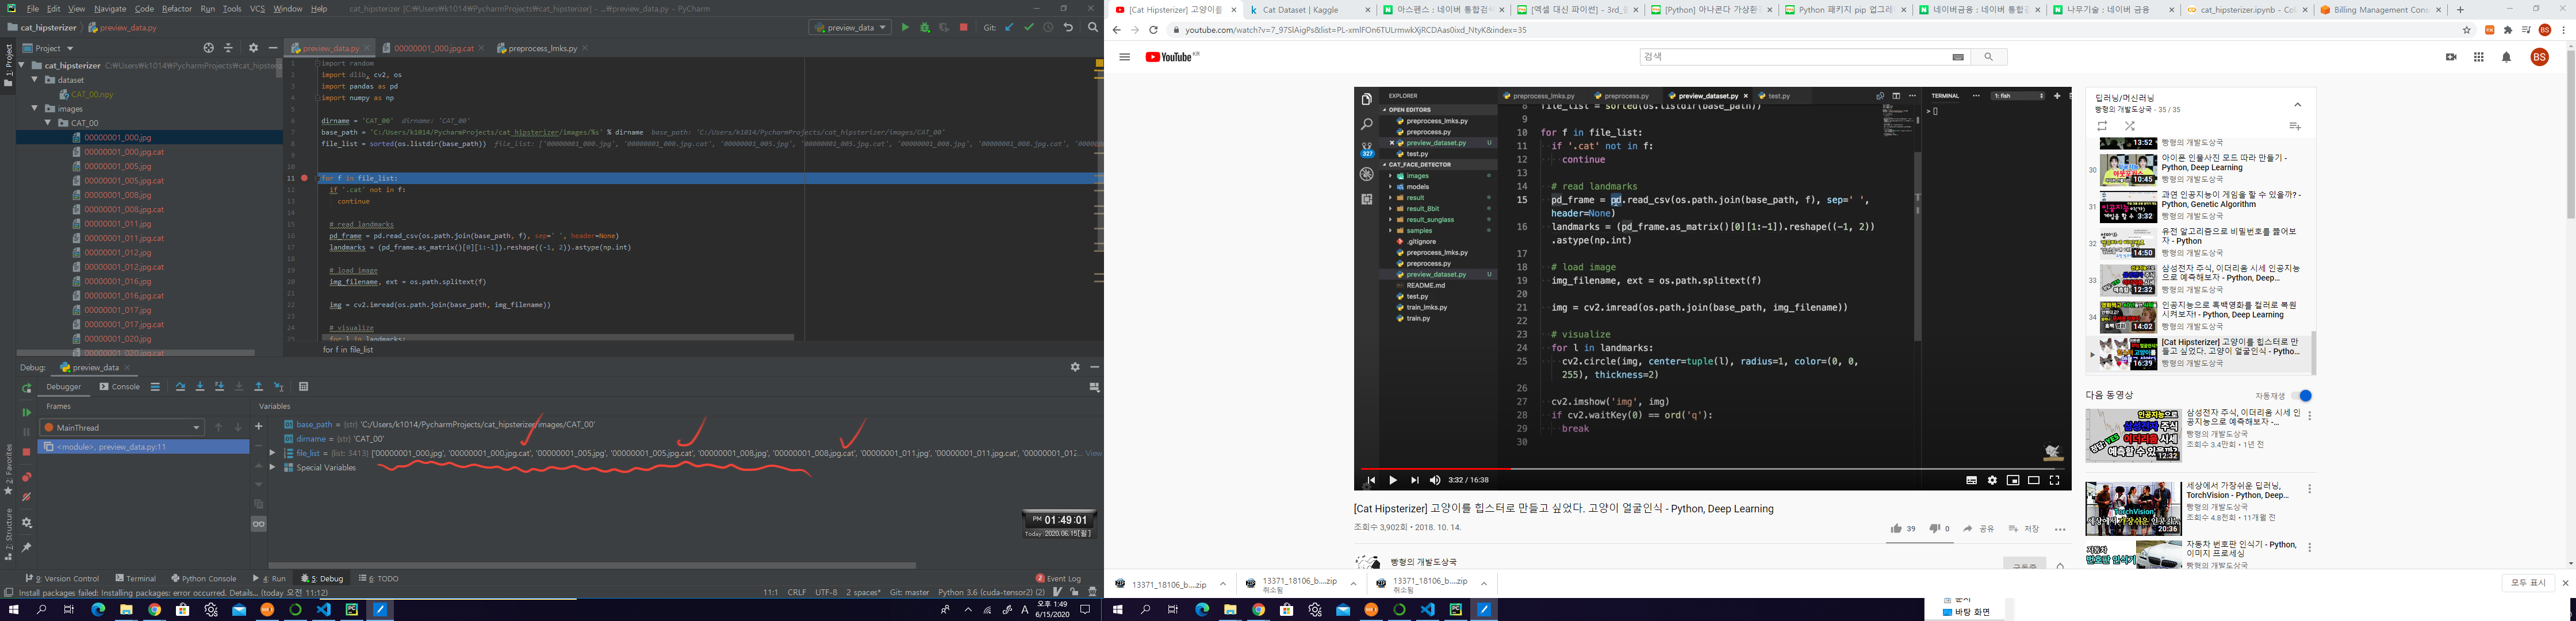 data를 찍어보면 다음과 같이 나온다
cat file을 불러서 landmark 값을 pandas로 9 * 2 형태로 바꿔줌
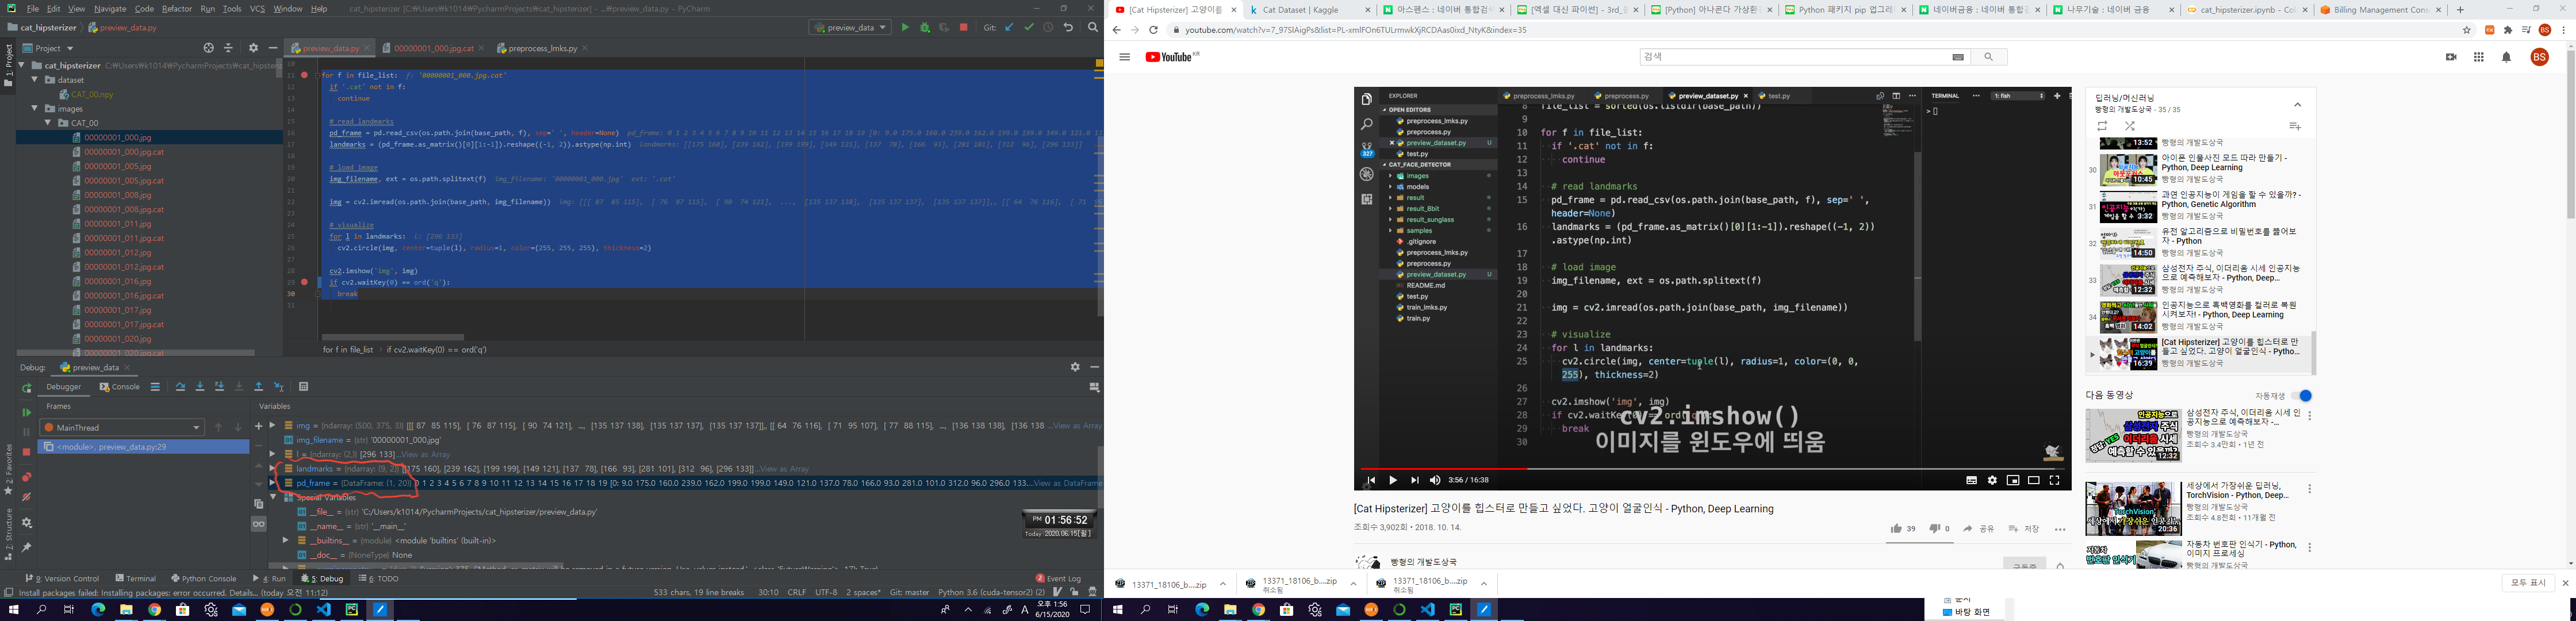
for f in file_list:
if '.cat' not in f:
continue
# read landmarks
pd_frame = pd.read_csv(os.path.join(base_path, f), sep=' ', header=None)
landmarks = (pd_frame.as_matrix()[0][1:-1]).reshape((-1, 2)).astype(np.int)
# load image
img_filename, ext = os.path.splitext(f)
img = cv2.imread(os.path.join(base_path, img_filename))
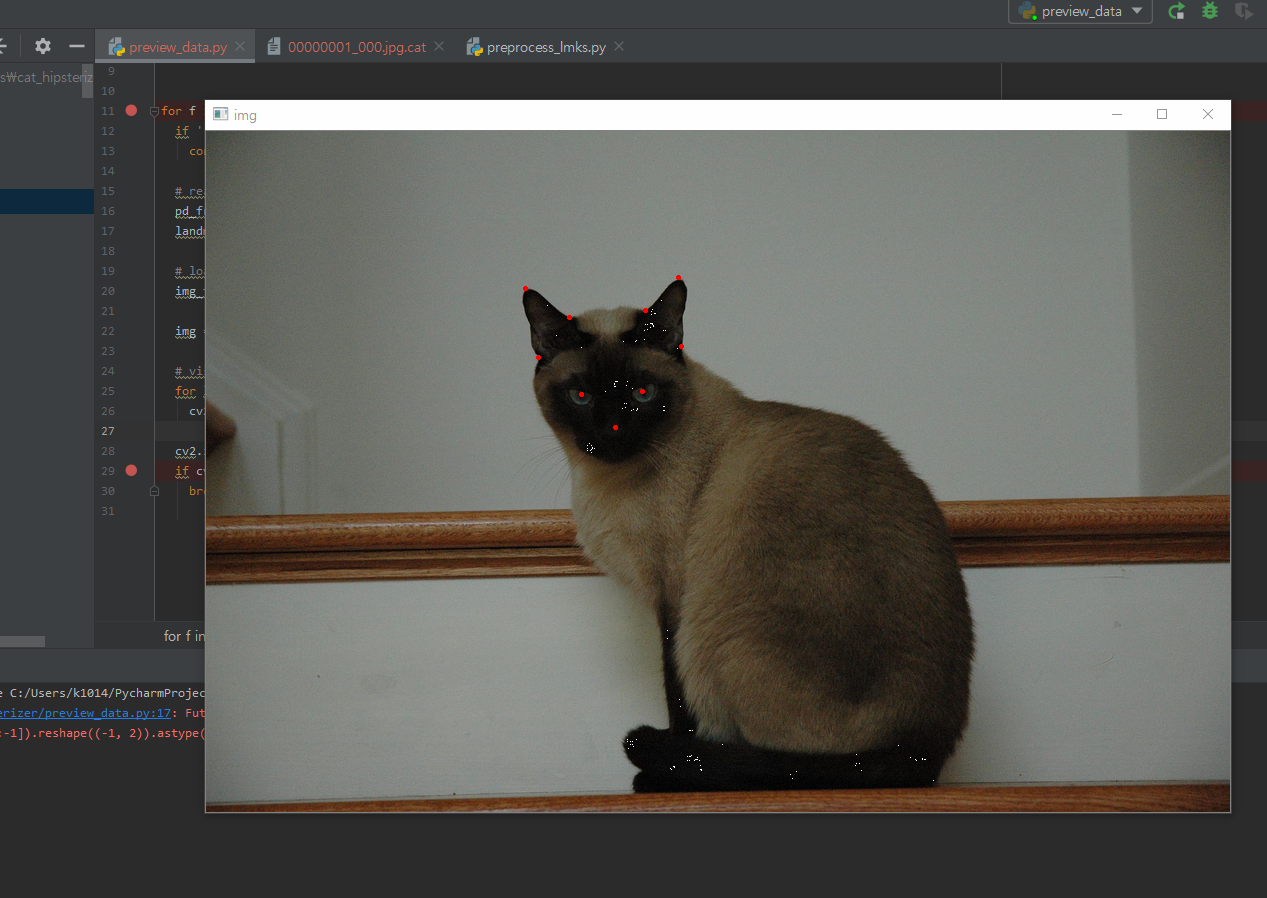
# visualize 이미지안에 landmark를 붉은색(0, 0, 225)으로 표시
for l in landmarks:
cv2.circle(img, center=tuple(l), radius=1, color=(0, 0, 255), thickness=2)
cv2.imshow('img', img)
if cv2.waitKey(0) == ord('q'):
break
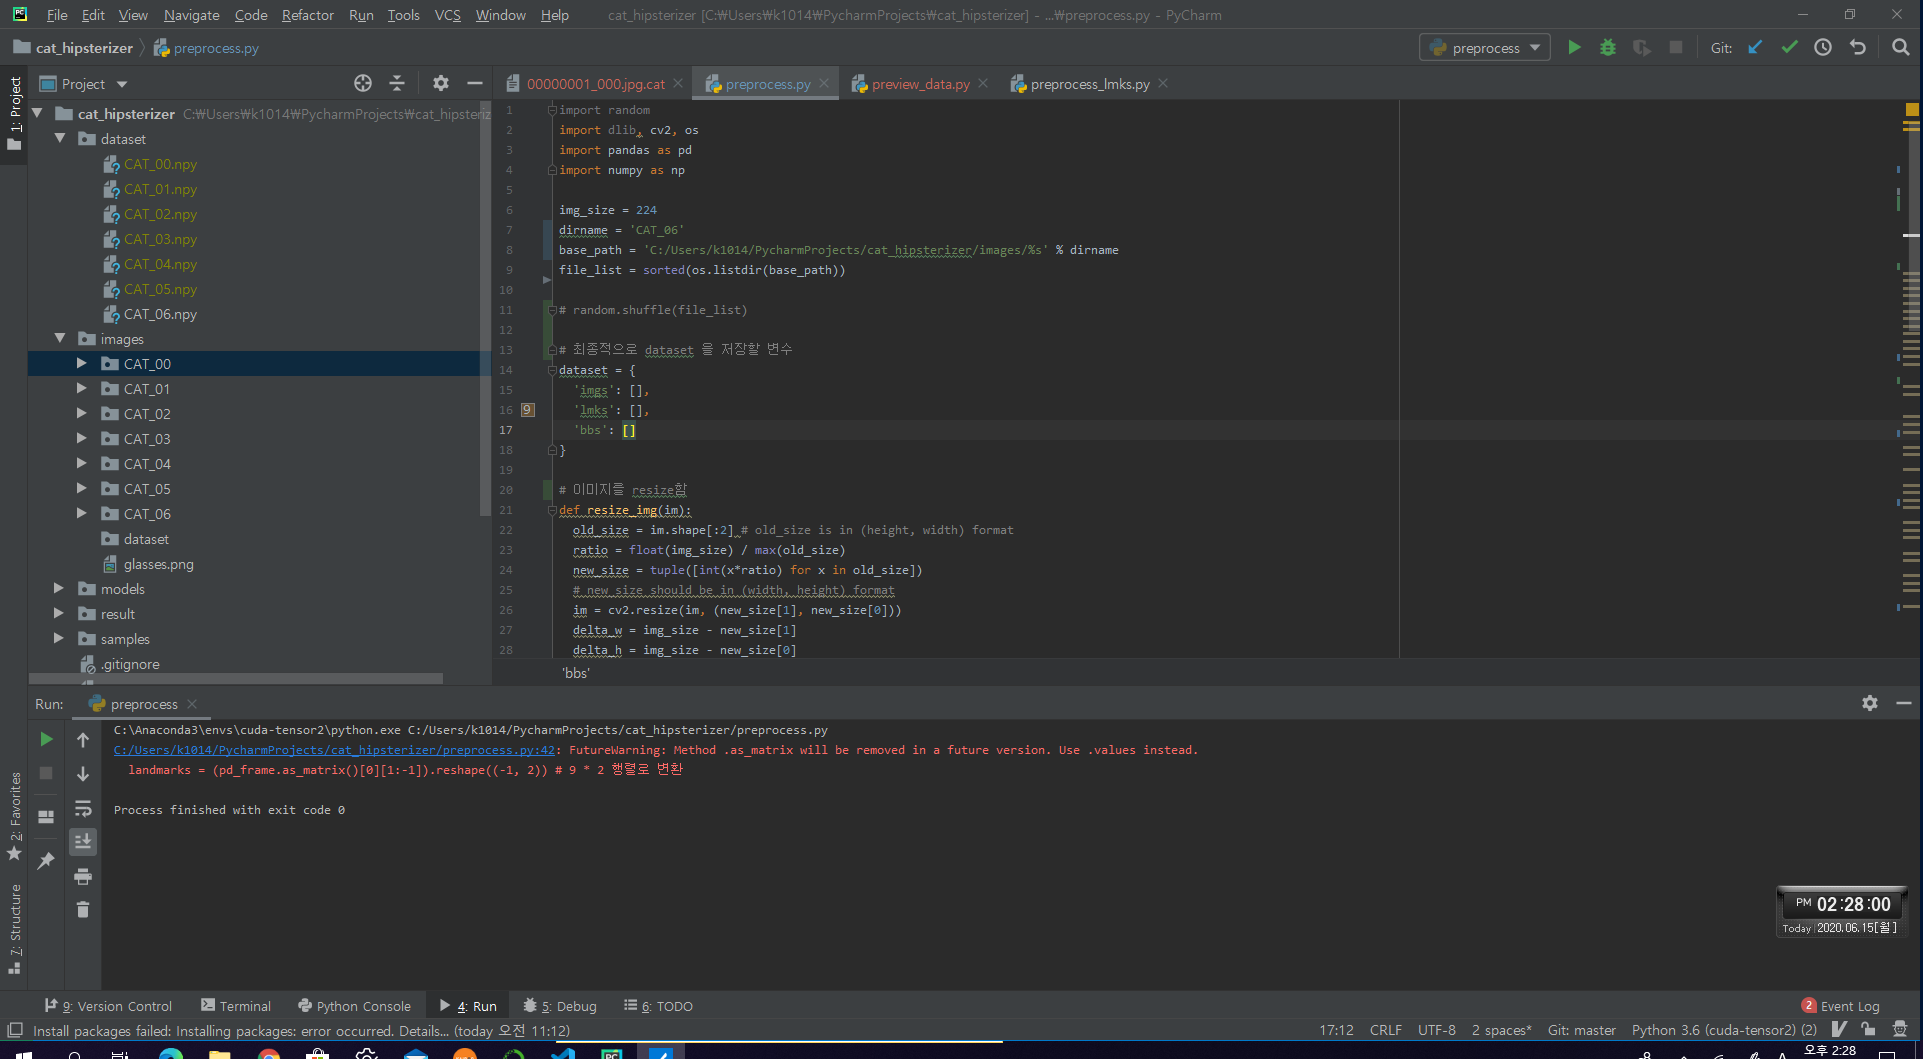
전처리
img_size = 224
dirname = 'CAT_00'
base_path = 'C:/Users/k1014/PycharmProjects/cat_hipsterizer/images/%s' % dirname
file_list = sorted(os.listdir(base_path))

# random.shuffle(file_list)

# 최종적으로 dataset 을 저장할 변수
dataset = {
  'imgs': [],
  'lmks': [],
  'bbs': []
}

# 이미지를 resize함
def resize_img(im):
  old_size = im.shape[:2] # old_size is in (height, width) format
  ratio = float(img_size) / max(old_size)
  new_size = tuple([int(x*ratio) for x in old_size])
  # new_size should be in (width, height) format
  im = cv2.resize(im, (new_size[1], new_size[0]))
  delta_w = img_size - new_size[1]
  delta_h = img_size - new_size[0]
  top, bottom = delta_h // 2, delta_h - (delta_h // 2)
  left, right = delta_w // 2, delta_w - (delta_w // 2)
  new_im = cv2.copyMakeBorder(im, top, bottom, left, right, cv2.BORDER_CONSTANT,
      value=[0, 0, 0]) # 비어있는 부분은 검은색으로 칠함
  return new_im, ratio, top, left

# cat 파일만 불러오도록 필터링
for f in file_list:
  if '.cat' not in f:
    continue

  # read landmarks
  pd_frame = pd.read_csv(os.path.join(base_path, f), sep=' ', header=None)
  landmarks = (pd_frame.as_matrix()[0][1:-1]).reshape((-1, 2)) # 9 * 2 행렬로 변환

  # load image
  img_filename, ext = os.path.splitext(f)

  img = cv2.imread(os.path.join(base_path, img_filename))

  # resize image and relocate landmarks
  img, ratio, top, left = resize_img(img)
  landmarks = ((landmarks * ratio) + np.array([left, top])).astype(np.int) # 변한 landmark를 재 계산
  bb = np.array([np.min(landmarks, axis=0), np.max(landmarks, axis=0)]) # 얼굴의 영역. landmark의 최소점, 최대점을 구함

  dataset['imgs'].append(img)
  dataset['lmks'].append(landmarks.flatten())
  dataset['bbs'].append(bb.flatten())

  # for l in landmarks:
  #   cv2.circle(img, center=tuple(l), radius=1, color=(255, 255, 255), thickness=2)

  # cv2.imshow('img', img)
  # if cv2.waitKey(0) == ord('q'):
  #   break

np.save('dataset/%s.npy' % dirname, np.array(dataset)) # 마지막 전처리된 데이터 저장
CAT_00.npy … 파일들이 저장됨
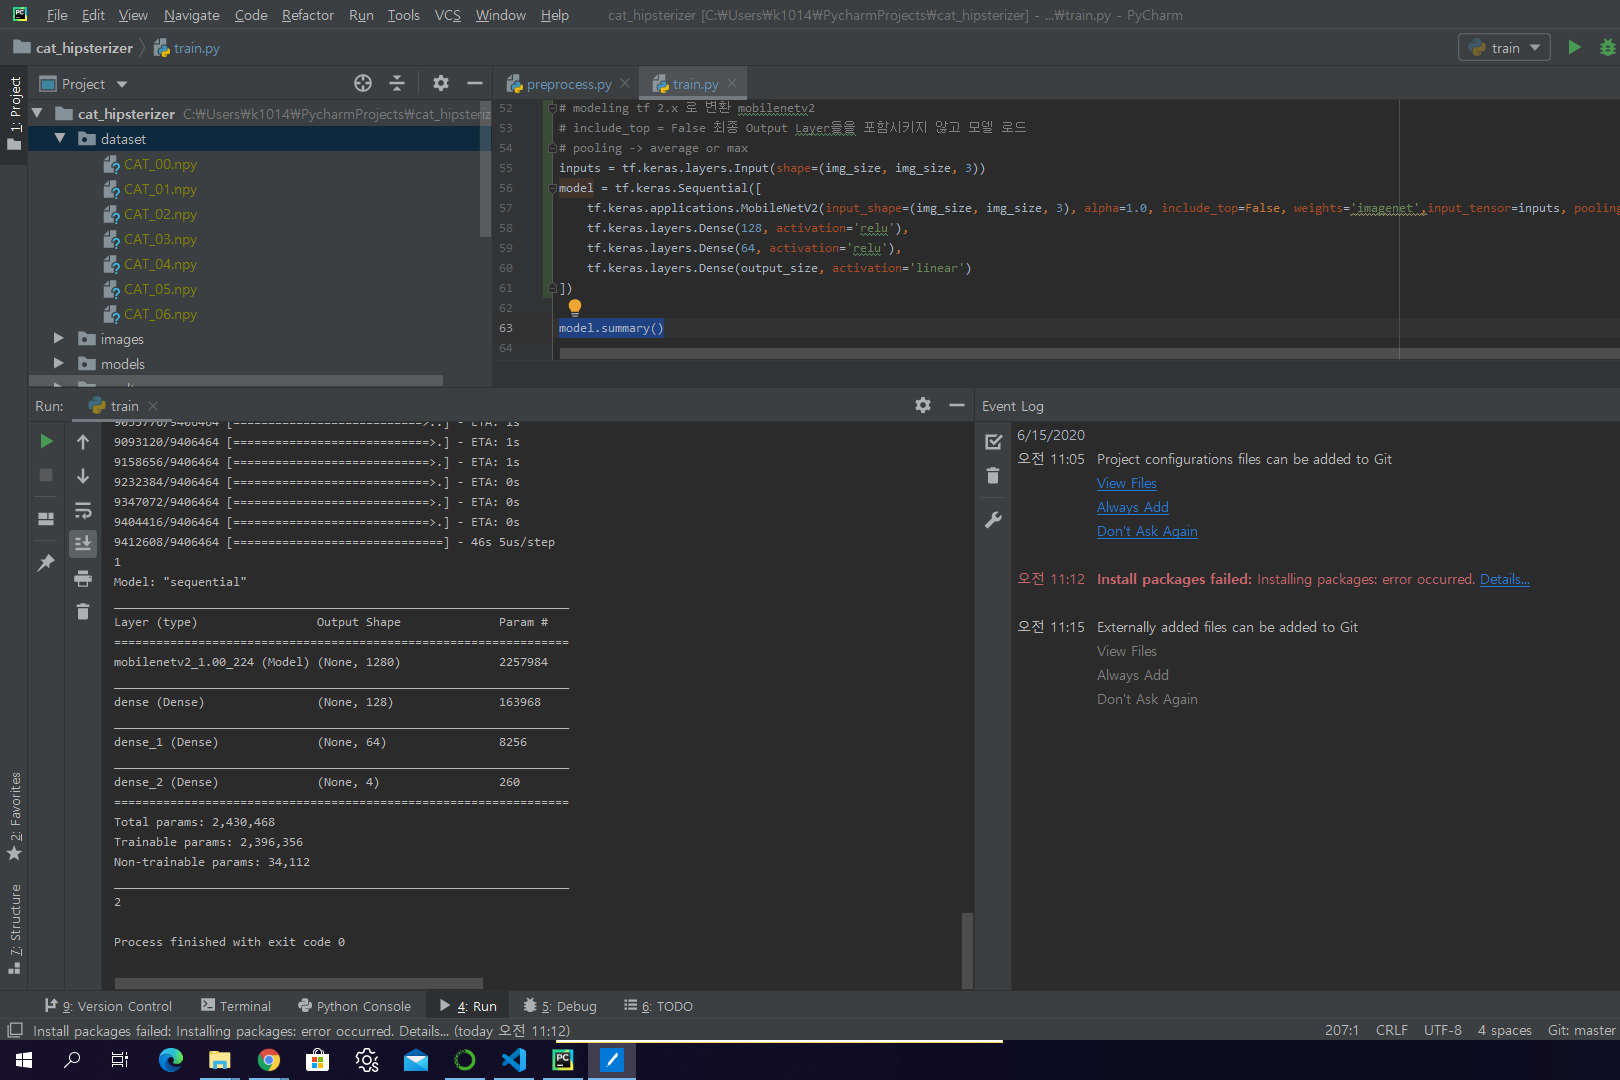
모델 생성
# modeling
'''
inputs = Input(shape=(img_size, img_size, 3))

mobilenetv2_model = mobilenetv2.MobileNetV2(input_shape=(img_size, img_size, 3), alpha=1.0, depth_multiplier=1, include_top=False, weights='imagenet', input_tensor=inputs, pooling='max')

net = Dense(128, activation='relu')(mobilenetv2_model.layers[-1].output)
net = Dense(64, activation='relu')(net)
net = Dense(output_size, activation='linear')(net)

model = Model(inputs=inputs, outputs=net)
'''

# modeling tf 2.x 로 변환 mobilenetv2
# include_top = False 최종 Output Layer들을 포함시키지 않고 모델 로드
# pooling -> average or max
inputs = tf.keras.layers.Input(shape=(img_size, img_size, 3))
model = tf.keras.Sequential([
    tf.keras.applications.MobileNetV2(input_shape=(img_size, img_size, 3), alpha=1.0, include_top=False, weights='imagenet',input_tensor=inputs, pooling='max'),
    tf.keras.layers.Dense(128, activation='relu'),
    tf.keras.layers.Dense(64, activation='relu'),
    tf.keras.layers.Dense(output_size, activation='linear')
])

model.summary()
컴파일
# training
model.compile(optimizer=tf.keras.optimizers.Adam(), loss='mse')

model.fit(x_train, y_train, epochs=50, batch_size=32, shuffle=True,
  validation_data=(x_test, y_test), verbose=1,
  callbacks=[
    tf.keras.TensorBoard(log_dir='logs/%s' % (start_time)),
    tf.keras.ModelCheckpoint('./models/%s.h5' % (start_time), monitor='val_loss', verbose=1, save_best_only=True, mode='auto'),
    tf.keras.ReduceLROnPlateau(monitor='val_loss', factor=0.2, patience=5, verbose=1, mode='auto')
  ]
)